Core Credits: Processing Claims towards Vendors in EMDECS
This article will detail how to create an XLS document to submit Core Claims to vendors within EMDECS using the Core Manager screen.

This addresses the administrative side of the process and does not cover the return process for the shop department.
Video Walkthrough
Creating a Core Return
To begin a Core Return, create an RO and add the desired part. When adding a core by itself, there will be a checkbox that allows you to mark the part as a Core Return. The Issue button changes to reflect this as well.
Complete RO
Processing the Core Return
Create Claim Export File
After processing the claim towards your customer, go to Parts-> Cores in order to create the claim towards your vendor.
Select the vendor from the list on the left-hand side. Only vendors with active core claims will appear here. Once the information populates, click Create Claim. A pop-up will display all cores within the claim, select Export Claim File. The system will ask for a reference number before completing this action.
EMDECS will then render an XLS document for the Core Claim, which will appear in the downloads file of your browser.
Create Vendor Credit
When processing the credit, please be careful of which claim you select. Your vendor may appear more than once on this page, and it is the Reference number that will let you know which claim is which.
Enter the Recovered Amount and select the checkbox for "Request Depot to Return Parts". When ready, click on Process Credit.
Claim History
All claims can be viewed on the History tab. This is a data only page and does not contain any hyperlinks
Claim Vendor Return
The system does not differentiate Clean vs Dirty when looking at the On-Hands for Cores, therefore your inventory will not update in EMDECS without performing a Return towards the Vendor after processing the Core Claim.
Create a Quick Receiving under Parts-> Receive Parts-> Things to Do
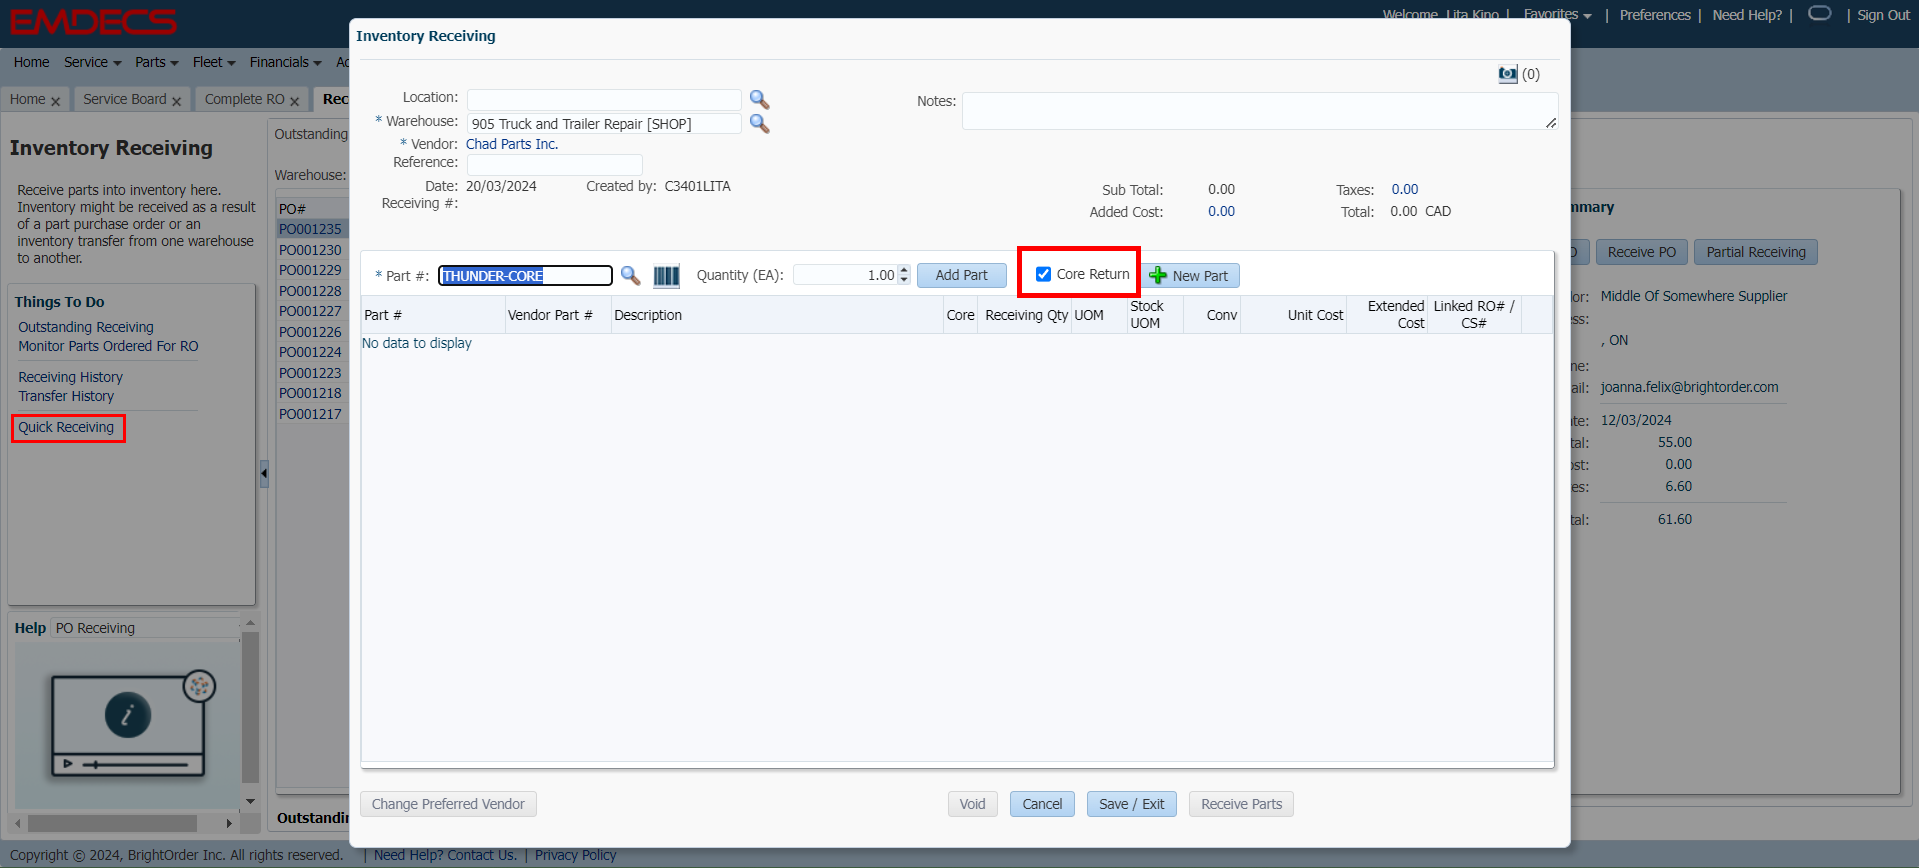
When a Core Part is entered into the Part# Field the Core Return checkbox will appear. Enter the qty and press Add Part. The system will automatically turn it into a negative amount when adding it to the Receiving
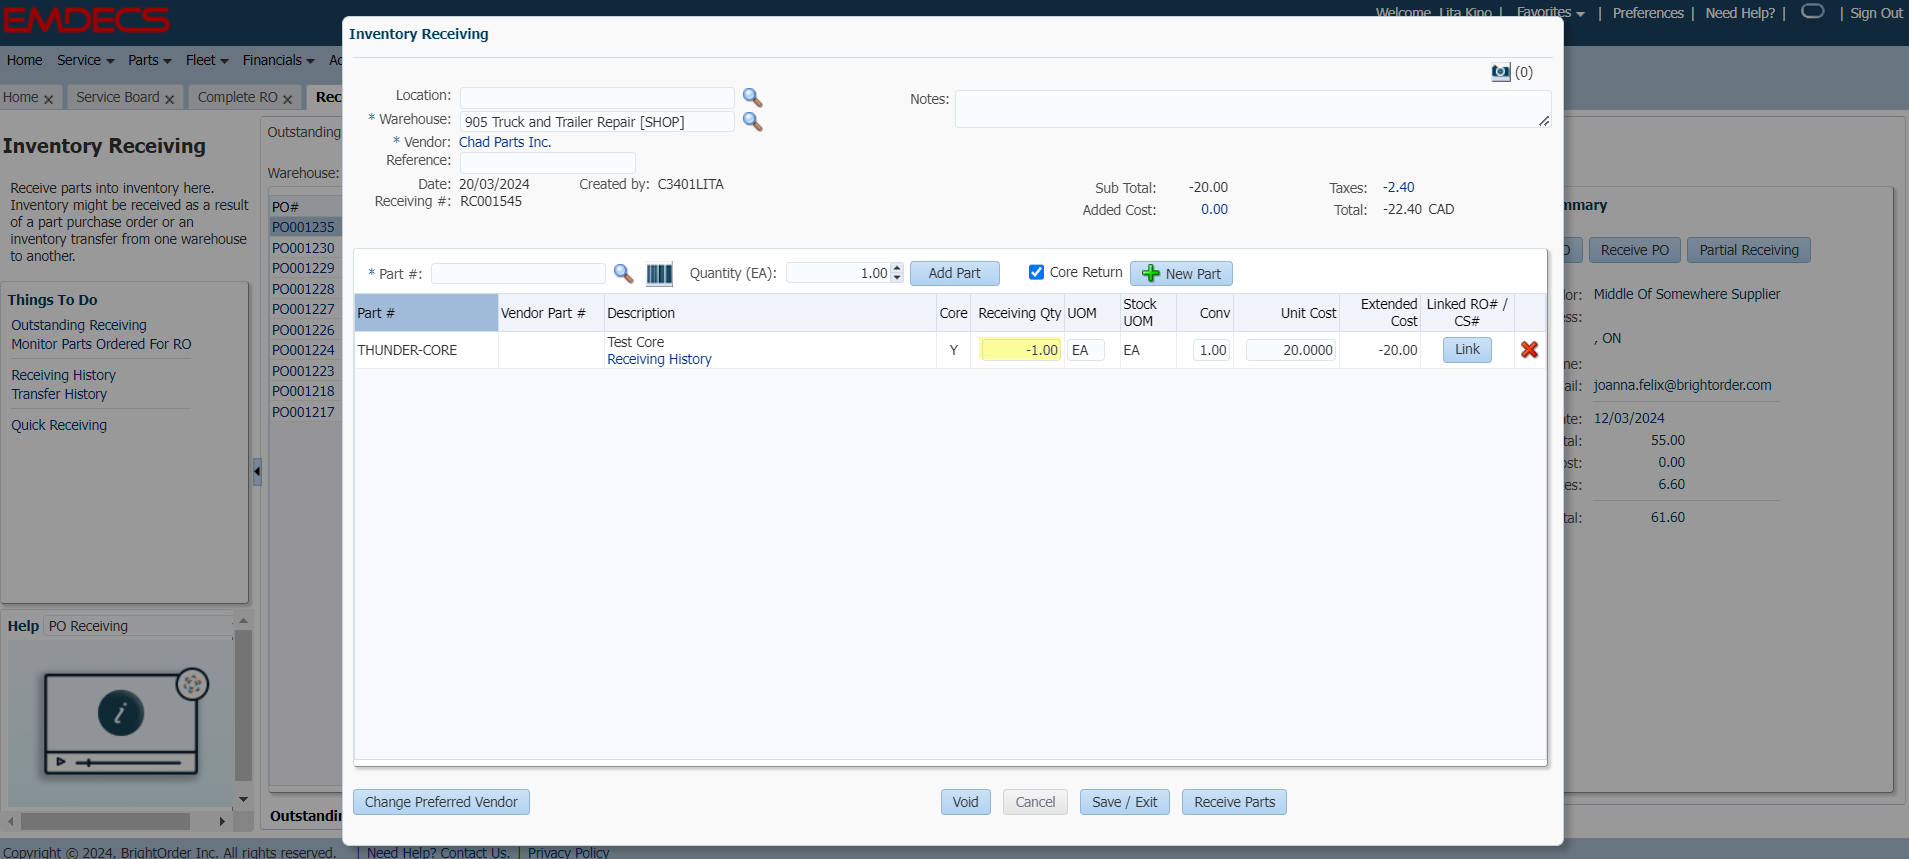
If done, press Receive Parts.
The Dirty Cores will now be removed from Inventory, keeping the amount of Clean cores accurate.
Related Articles
Warranty Manager Setup and Processing Warranty Claims (Video)
1 Introduction This article and videos provide an overview of how to configure unit and part warranties in EMDECS, assign vendors as warranty manufacturers, and provides a walkthrough of the warranty manager system. 2 Video Walkthrough: ...EMDECS System Update: Q3 2021
Please be advised that new system updates will be released on July 18th and July 25th, 2021. No system downtime is required. The release date and time varies based on which EMDECS database / URL you use to access the system: Sign in URL: ...Create a New Part
This article will provide an overview of creating a new part in EMDECS. Video Walkthrough Create a New Part in the Part Master 1. Open the Parts menu and click on Part Master. 2. To create a new part, click on the + New Part button in the top right ...AR Manager: Manage Accounts Receivable and Receive Customer Payments (Video)
Expand the table of contents above to skip to a specific section. 1 Introduction The AR Manager (Accounts Receivable Manager) is your one stop shop to view your aged receivables and manage customer payments. You can also record customer call notes to ...EMDECS System Update: Q2 2021
Please be advised that new system updates will be released on April 25th and May 2nd. No system downtime is required. The release date and time varies based on which EMDECS database / URL you use to access the system: Sign in URL: ...